Replacing an E-Bike Controller or Display When the OEM Part Is Gone
The motor is fine, the battery is fine, and the bike is dead anyway — because a $60 box of electronics failed and the manufacturer no longer stocks it. The identification-first method for finding a replacement that works, and the honest odds at each step.
Some links below are affiliate links. If you buy through them, EbikeTested may earn a commission at no extra cost to you. Commissions never touch a score, and the failures get published anyway. Full details on our affiliate disclosure page.
A dead controller or display is the most fixable "dead e-bike" there is — and the fix fails when people shop before they identify. The controller is a commodity part; your bike's *connectors* are not.
- The blocker is never the electronics, it is the plugs. As a Radwagon 4 owner put it while shopping for a third controller: "I'm guessing the biggest problem is the unusual motor-connector." That guess is exactly right, and it is where this guide starts.
- Identify before you buy: battery voltage, motor type and wattage, and — with photos and a pin count — every connector on the old controller. That twenty minutes decides whether a $70 universal kit is a repair or a box of frustration.
- **Universal kits replace the controller *and* display together.** A generic controller almost never speaks your OEM display's protocol, so plan the swap as a system, not a part.
- Know when to stop: if the motor connector is proprietary and undocumented, the honest options are pigtail surgery, a shop, or accepting the bike's economics — and if you are already asking whether a bike you can't get parts for is worth owning, this page is the data for that decision, both directions.
Nothing here requires bench skills beyond a multimeter and patience. Everything here changes the bike's electrical behavior — so it also changes warranty and, if you raise limits, legality. We cover both.
Why controllers die and why replacements are scarce
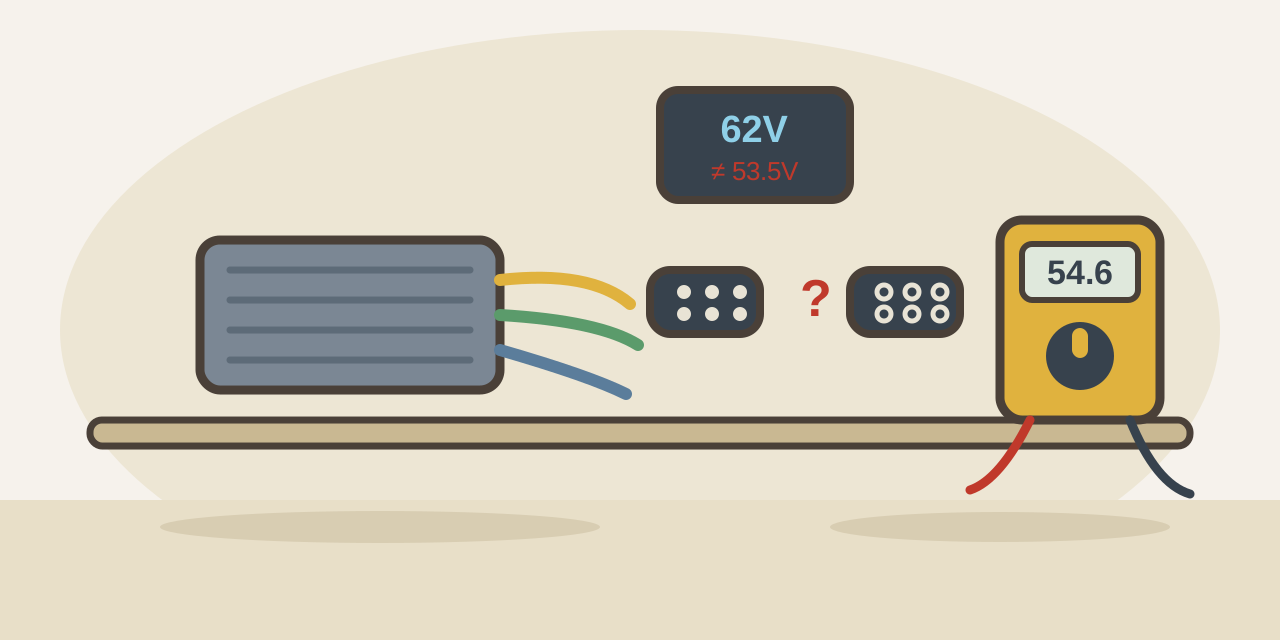
The controller is the small sealed box that turns battery current into the three-phase pulses a hub motor wants — working constantly, bolted where road spray lives, cooled by whatever air finds it. Failure modes in the owner threads are consistent: water ingress (the Radwagon owner's display showed a phantom 62V on a battery measuring 53.5V, with visible water damage — classic corrupted sense circuitry), heat-stressed MOSFETs on bikes ridden hard at max assist, and vibration-fatigued solder joints and connectors.
Scarcity is the business model, not an accident. Direct-to-consumer brands stock spares for current models; a bike two generations old competes for warehouse space with products still selling. And running changes make it worse — one owner in this cycle found Rad had no rear wheel in inventory matching his motor's older male/female connector generation, which is the same problem wearing a different part number: *the spec that strands you is the connector generation, not the component.*
The good news is structural too. Under the proprietary plugs, most hub-motor e-bikes are built from the same commodity architecture the kit-conversion world has documented for fifteen years. That is why universal replacements exist at all, and why the whole job turns on translating your bike into that world's vocabulary: volts, watts, phase and hall wires, and plug families.
Step one: identify what you have — the twenty minutes that decides everything
Do all of this before opening a single product page. Pull the old controller (usually under the downtube cover, in the frame, or in a controller bag) and document:
1. Battery voltage. From the battery label: 36V, 48V and 52V are the common classes. The replacement must match. If the label is ambiguous, a multimeter across the discharge terminals settles it — a fully charged 48V pack reads about 54.6V, a 36V pack about 42V. The multimeter is the one tool purchase this job genuinely requires, and it will also diagnose whether your "dead controller" is actually a dead battery, fuse or switch before you spend anything.
2. Motor power and type. The wattage is usually on the motor shell or the bike's spec page. A 500W-class controller on a 750W motor underperforms; the reverse cooks the motor. Note whether the motor is hub (geared or direct-drive) or mid-drive — mid-drives are a different world where this guide's universal-kit advice mostly does not apply.
3. Every connector, photographed. This is the step the whole repair turns on. Lay the old controller out and photograph each plug: the thick three-wire phase connector to the motor (often yellow/green/blue), the small multi-pin hall/speed sensor connector (commonly inside the same combined plug on modern bikes), display, throttle, PAS sensor, brake cutoffs, lights. Count pins, note genders, note colors. Most of the market uses one of two waterproof round-plug families — Julet and Higo — in 2- to 9-pin versions, and matching your photos against a kit listing's connector photos is how compatibility is actually established. If your plugs match a standard family, your odds are good. If your motor-side plug matches nothing you can find, that is the proprietary wall, and you have found it *before* spending money, which was the point of this step.
Step two: choose the path your connectors allow
Path A — OEM or OEM-adjacent, if it exists. Check the manufacturer's parts store first, then the brand's owner forums and groups, where discontinued-part stock and verified third-party substitutes get tracked. For popular brands (Rad, Lectric, Aventon), specialist e-bike parts shops sell drop-in controllers with correct plugs. A drop-in at 1.5x the generic price is nearly always the better buy — everything below this line exists for when it is not available at any price.
Path B — a universal controller + display kit. Generic "KT"-style kits — controller, matched display, often a full wiring harness — are the standard answer, sized by voltage and wattage. Three honest rules. First, buy controller and display as a matched pair: display-to-controller protocols are proprietary per family, so your OEM display will not talk to a generic controller; treat both as gone. Second, expect to lose brand features — the app, the OEM battery gauge's accuracy, torque-sensor assist on bikes that had it (most generic kits are cadence-based), and integrated light control. The bike rides; it is not identical. Third, connector mismatches on one or two wires are normal and solved with pigtail adapters or, at worst, cutting and soldering the old controller's plugs onto the new harness — which is exactly the surgery to decide you are up for *before* ordering, not after.
Path C — stop. If the motor-side connector is proprietary *and* the motor is unusual *and* the bike needs other work: a $4,000 bike becoming "non-functional furniture" over unobtainable electronics is this cycle's cautionary thread, and sometimes the honest repair is a conversion kit or a different bike. The line we would draw: if the total parts-plus-shop bill passes half the price of a comparable new bike from a parts-available brand, the repair is sentiment, not economics.
One more community-sourced caution: owners also swap controllers to *unlock* speed or power on working bikes — this cycle's Radster Trail thread is a Canadian owner weighing the US-spec controller for exactly that. Mechanically it is the same job as a repair swap. Legally it is not: raising assist limits can reclassify the bike out of e-bike law entirely, voiding where you can ride it and how insurers treat it. We are documenting the repair use.
The decision, compressed
| Your situation | The move | The catch |
|---|---|---|
| Brand still sells your controller | Buy OEM, even at a premium | Check the connector *generation* matches, not just the model name — running changes are common. |
| OEM gone; plugs match Julet/Higo standards | Universal kit, matched controller + display | Lose app/torque-sensing/light integration; verify voltage and wattage class before plug shapes. |
| One or two connectors don't match | Kit + pigtail adapters, or splice old plugs onto new harness | Soldering in the rain-exposed path demands adhesive-lined heat shrink and patience. |
| Display dead, controller alive | Replace display within the same family (KT display for KT controller, etc.) | Cross-family displays don't talk. A phantom voltage reading, like 62V on a 53.5V pack, can be the display lying — test before buying a controller. |
| Proprietary motor plug, no documentation | Shop consult; weigh Path C | Budget the repair against half the price of a new parts-available bike, and let that number decide. |
| Bike works; you want more speed | Understand this reclassifies the bike in most jurisdictions | Same wrench work, different legal object. Insurance and trail access ride on it. |
The kit
This category resists specific product picks honestly: the right controller kit is determined by your bike's voltage, wattage and connector photos, not by a roundup. So the concrete recommendations are the diagnostic tool and the connector hardware — the parts that are right for everyone — with kit searches scoped by class. EbikeTested has not bench-tested controller kits; verify pin-outs against your own photos before ordering. Prices move constantly, so we do not quote them.
 Buy first
Auto-ranging digital multimeter
The tool that turns guessing into knowing: confirms pack voltage class, catches dead fuses and switches masquerading as dead controllers, and exposes lying displays — this cycle's 62V reading on a measured 53.5V pack is exactly the trap. Any reputable auto-ranging meter under $40 covers every check in this guide.
See options on Amazon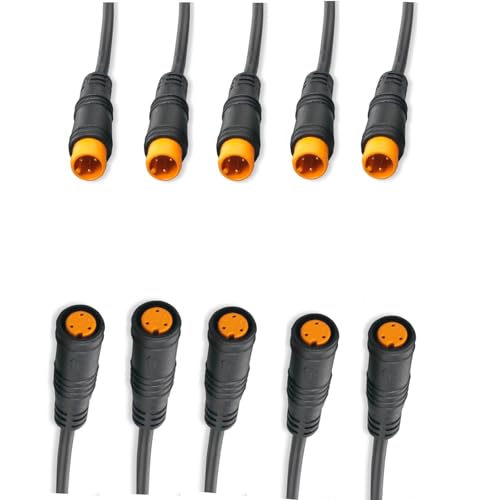 The compatibility bridge
Julet/Higo connector pigtails and extensions
Waterproof round-plug pigtails in 2–9 pin versions that adapt a near-miss kit to your bike without cutting the motor's own cable — always splice on the cheap harness side, never the motor side. Match pin count and gender against your connector photos.
See options on AmazonUniversal controller + display kits (by voltage class)
Search within your identified class — 36V or 48V, and your motor's wattage — and compare listing connector photos against your own. Kits including the full harness and display save the protocol-mismatch trap. Adhesive-lined heat shrink and silicone tape belong in the same order.
See options on AmazonSafety lines that are not optional: disconnect and remove the battery before touching any connector — a 48V pack delivers enough current to weld tools and burn hands. Never work on a charging bike. Match voltage class exactly; a 52V pack on a 48V-labeled controller may run but cooks components at the margin. And if you raise power or speed limits while you are in there, understand you may have reclassified the bike out of e-bike law where you live — that is a choice to make knowingly, not a side effect to discover at a trailhead or an insurance claim.
Controller and display swaps: FAQ
How do I know the controller is the problem and not the battery or display?
Multimeter first. Battery: voltage at the discharge port — a pack reading far below its class, or dropping hard under load, is the actual culprit in a large share of 'dead controller' stories. Display: displays fail and lie more often than controllers — a nonsense voltage reading with a healthy measured pack points at the display or its water-damaged cable. Controller: pack healthy, display sane, motor unresponsive, and especially any burnt smell or a motor that stutters in rhythmic thumps — that last one is a classic failed-MOSFET signature.
Can I keep my original display with a new generic controller?
Assume no. Display-controller communication is proprietary per family — KT displays speak KT, Bafang speaks Bafang, and OEM displays speak whatever the OEM's controller vendor used. Buy the matched pair a kit ships with. The exception is same-family replacement, which is why identifying what family your bike secretly belongs to is worth the effort.
Will a replacement controller work with my torque sensor?
Usually not. Most universal kits are cadence-based; torque-sensor support is the exception and must be stated explicitly in the listing. A torque-sensing bike downgraded to cadence assist rides noticeably differently — assist arrives by pedal rotation, not pressure. If torque assist is why you love the bike, hold out for a same-family or explicitly torque-compatible controller before settling.
Is this legal? The new controller lets me set a higher speed limit.
Replacing like-for-like to repair a bike is uncontroversial. Raising limits is a different act: US class rules and most trail-access policies cap assisted speed and power, and a bike configured past them generally stops being a legal e-bike regardless of what it looks like. Set the new controller to your bike's original class limits and you are on defensible ground; set it higher and you own the consequences knowingly.
How hard is the actual swap, once the right kit is in hand?
With matching connectors: an afternoon with hex keys — unplug everything, photograph as you go, transfer, route, plug, zip-tie, test with the wheel off the ground before riding. With one or two mismatches: add pigtail or splice work, adhesive-lined heat shrink on every joint, and test each circuit as you land it rather than all at once at the end. The skill floor is patience, not electronics.
Where this page sits
This is the electrical half of a question we started answering mechanically in what actually fits a Rad when OEM is sold out — same philosophy, different parts bin: identify the standard hiding under the brand, then buy the standard. If the repair math is tipping you toward replacing the bike instead, the budget e-bike guide is where we weight parts availability in the buying decision, and the battery and charger guide covers the other component that strands otherwise-good bikes. And since a bike you just revived is a bike worth keeping: locks and GPS trackers.